


You know what? Since I started using Customerly I really cannot do without!
Summarizing some of its most powerful features:
- Direct customer support with Live Chats
- Customer Intelligence and audience segmentation
- Email marketing and beautiful email templates easy to use
- Marketing Funnel Automation to enhance conversions
- Online Survey Tool
- Customer Satisfaction feedbacks collection
All of this and much more using a single tool! Amazing, isn’t it?
So, if you want to speed up your business you need fuel, and installing Customerly is exactly the fuel you need 😉
The easiest way to install it and manage all of its configurations, even the most advanced ones, is using Google Tag Manager, of course.
Are you ready? Let’s begin!
STEP 1 – COPY CUSTOMERLY’S CODE SNIPPET
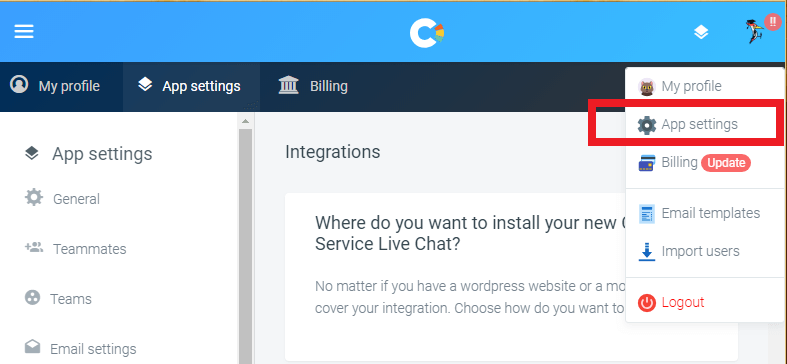
First of all, log into Customerly and go to “App settings”: you can find them in the menu inside your user profile.
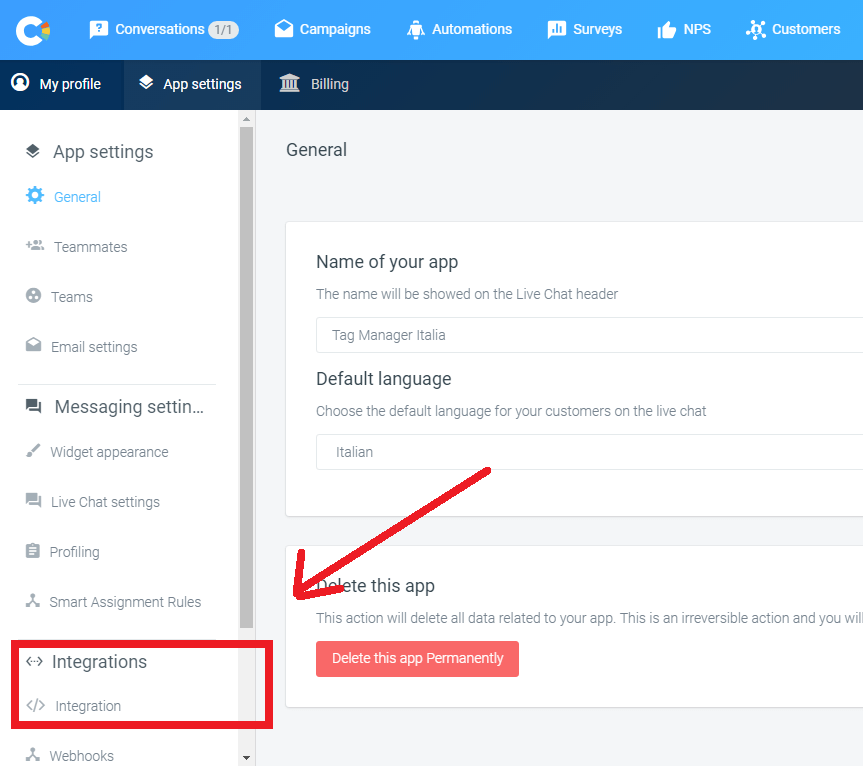
Now, click on “Integrations” and then again on “Integration”.
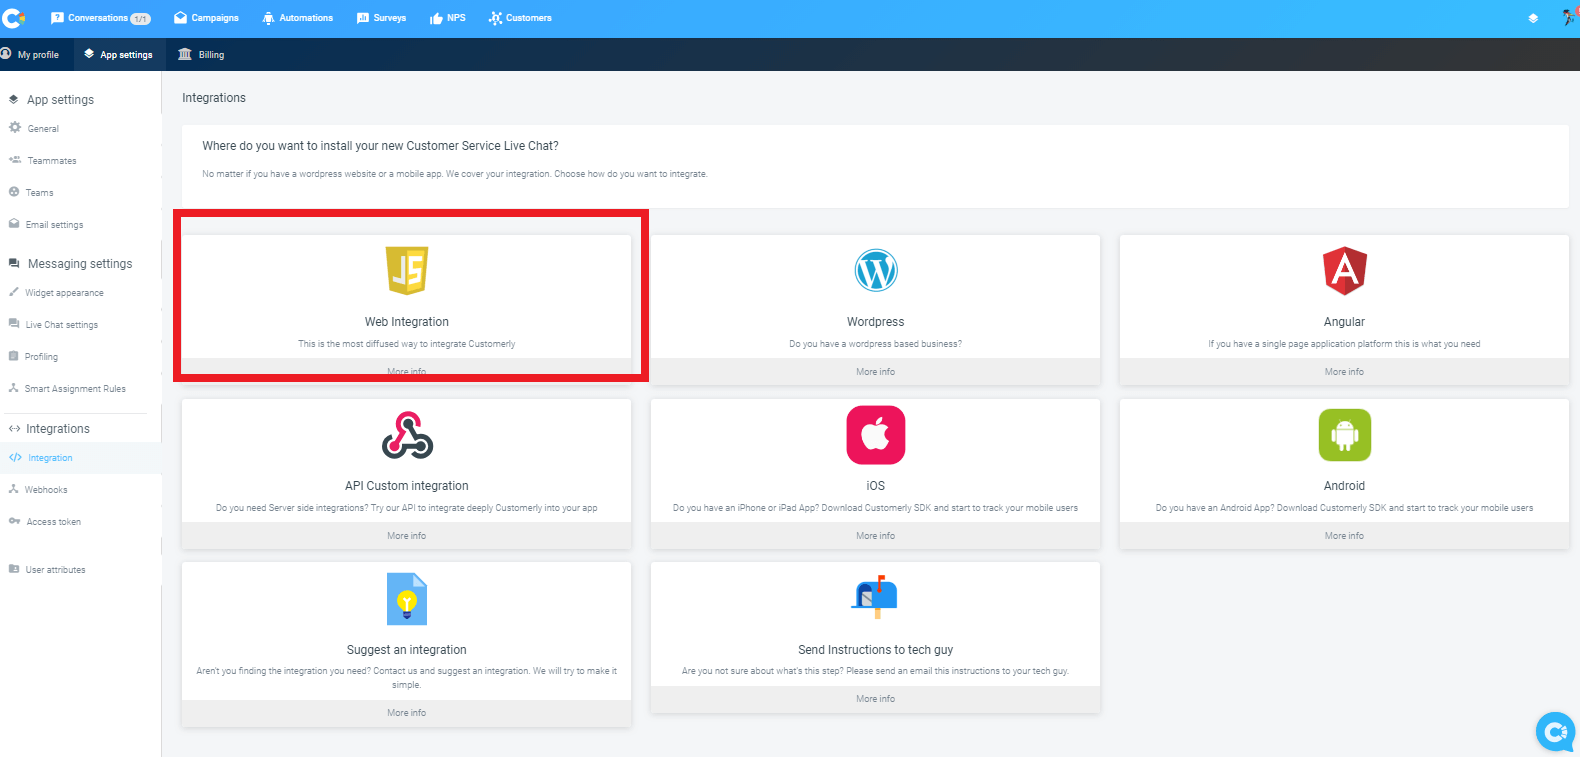
Here you can find many different options to install Customerly.
Unfortunately, Google Tag Manager is not available yet among the official option, but don’t panic: I’m gonna explain to you how to do it anyway 😉
Click on “Web Integration”.
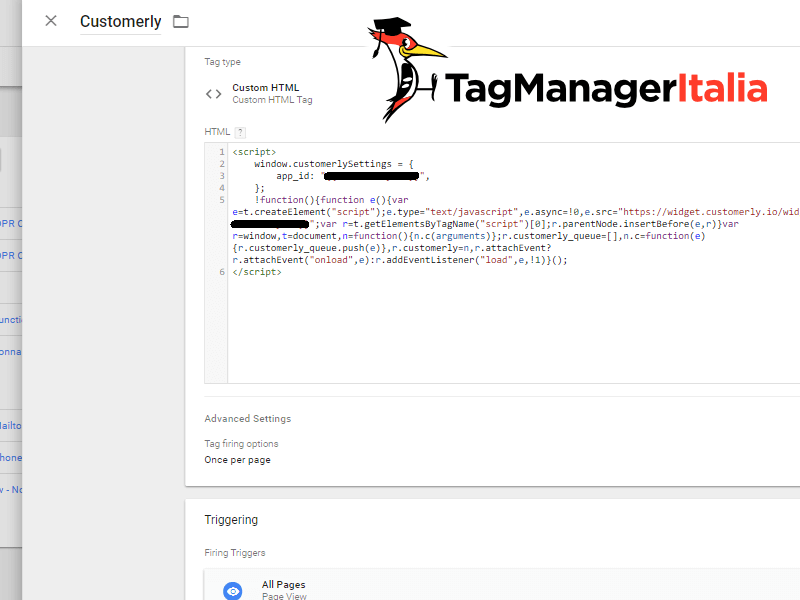
Here you’ll find the code snippet you need to install Customerly on your website. Copy it.
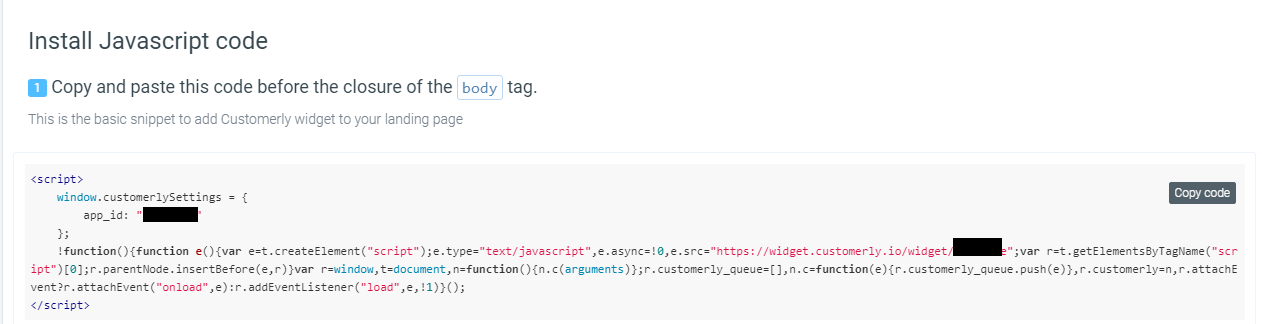
It will be similar to this one below, just the code XXXXXXXX I marked in red will be different: this is your Customerly ID code.
window.customerlySettings = { app_id: "XXXXXXXX" }; !function(){function e(){var e=t.createElement("script");
e.type="text/javascript",e.async=!0,e.src="https://widget.customerly.io/widget/XXXXXXXX";
var r=t.getElementsByTagName("script")[0];r.parentNode.insertBefore(e,r)}var r=window,t=document,n=function(){n.c(arguments)};
r.customerly_queue=[],n.c=function(e){r.customerly_queue.push(e)},r.customerly=n,r.attachEvent?r.attachEvent("onload",e):r.addEventListener("load",e,!1)}();
STEP 2 – CREATE A CUSTOM HTML TAG
Now that you have the code snippet, you can install it simply using a Custom HTML Tag.
- Log into your Google Tag Manager container
- Tags > New > Custom HTML
- Paste the code
- In “Advanced Settings” select: Tag firing options > Once per page
- Triggering: All pages
- Name the Tag “Customerly” and save it.
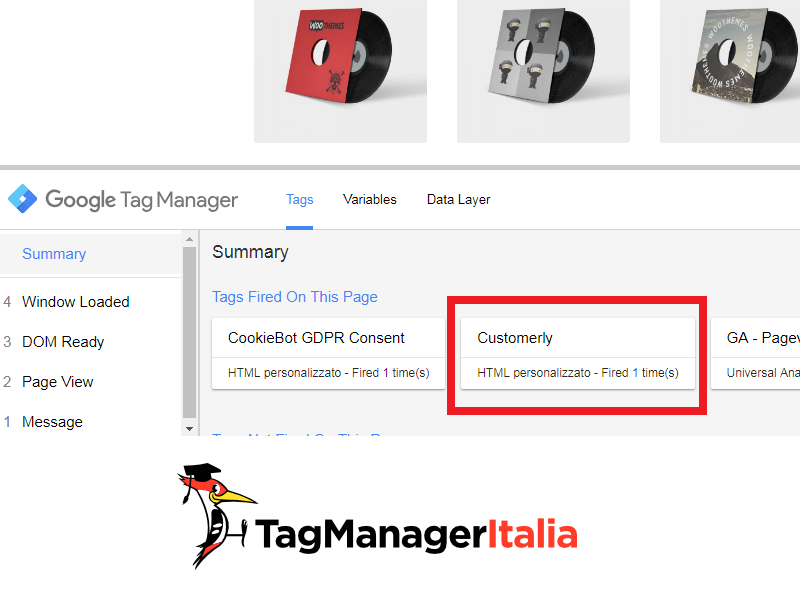
STEP 3 – CHECK THE TAG WITH PREVIEW MODE
We are almost done: you might want to check that everything works correctly (highly recommended!).
Activating the preview mode and going to any page in your website you should be able to see your new Customerly Tag among the “Tags Fired On This Page”.
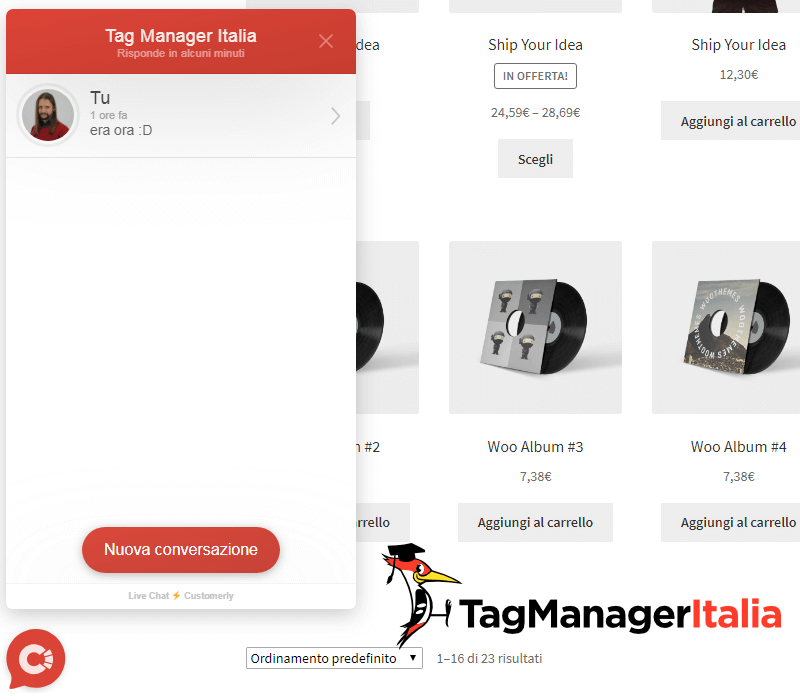
And here’s the widget 🙂
OH, WAIT! THERE’S SOMETHING MORE
Well, now you have installed Customerly with its basic features. But what if I tell you that you can do many other things? Like:
- managing the widget’s configurations (colors, opening or not the chat according to specific actions)
- create and manage custom attributes and segment users
- create custom events
Are you curious? I’m planning to write an advanced guide that will explain you all these extra features.
It will be soon available.


